Teeth whitening at home can be a low cost way to get a brighter whiter smile. Almost all of the bestselling home kits use teeth whitening trays to apply a gel to the surface of the teeth.
Most of these trays are exactly the same no matter which kit you choose to buy and so they way to use them can be applied to many of the teeth whitening kits.
What is a teeth whitening tray?
Originally used in whitening procedures carried out by dentists, teeth whitening trays are designed to be worn in the mouth up to 60 minutes depending on the gel being used. Thay are made from a malleable material that, when gently heated and applied directly to teeth, takes the shape of your own mouth. Sometimes called ‘Boil & Bite’, these teeth whitening trays are easy to use and take a thin coating of whitening gel to make sure it stays in contact with the teeth.
Teeth Whitening Tray Instructions

Step 1 – Mold and Form Teeth Whitening Trays
Place the teeth whitening tray in to freshly boiled water. Carefully keep hold of the tab and lower the rest of the tray in to the water for around 6-10 seconds and give it a chance to become a little soft before placing in to your mouth. The tray will become soft so make sure to hold it carefully and avoid the sides touching each other. Making sure that it covers the teeth press it in to place and close your mouth with your teeth firmly together. You can also use your fingers to press against the front of the tray to mold a better fit.

Step 2 – Fix the shape
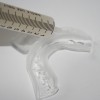
To fix the tray in to shape of the tray, remove from your mouth and rinse in to cold water. You should now have a teeth tray which matches the shape of your teeth like ours in the picutre. If you are not happy with your first attempt, don’t worry, you can repeat step 1 until you’ve got it right.
You can now remove the tabs with scissors and trim any excess around the gum line. Any sharp edges can be removed by carefully placing only the effected part in to boiling water for 6 seconds and gently rub away the edge while it’s soft.

Step 3 – Applying the Gel
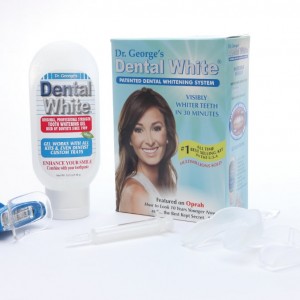
Teeth whitening kits like Botanical White or Dr Georges Dental White all use a whitening gel supplied in syringes. This makes it much easier to apply the right amount gel to the mouth trays. Carefully squeeze a thin line of gel along the bottom of the tray from one end to the other and place in to your mouth over the teeth.
Wear the tray in position for the required time for your gel and repeat the process for upper and lower teeth. Once you are done, rinse the teeth whitening trays and store them in a cool dry place to retain its shape.
Teeth Whitening Tray Tips
Brush your teeth before using teeth whitening trays
Make sure that trays are clean and dry before applying whitening gel into them since moisture reduces the efficacy of the whitening gel
Use a toothbrush to clean your whitening trays after use
Don’t worry if you don’t get the shape right first time, you can easily reheat and try again.
How to mold teeth whitening trays at home
Reccomended for Teeth Whitening at Home

With results guaranteed and a proven record of success, the Dr Georges Dental White Kit is based on a formulation of carbamine peroxide, making it one of the best selling teeth whitening kits available.
With prices starting from £24.99, it's our #1 kit for teeth whitening at home.
- Visible whitening only after one treatment
- Only need to use for 30 minutes per day
- Satisfaction guaranteed - Full refund
- Worldwide shipping from Smile4You

